
If you are a developer, the chances are you have heard about Kubernetes. You heard that it is an amazing tool to help you scale your applications and manage your micro-services. But, you probably also heard that it is VERY complex. It is so complex that you were probably scared off. And I don’t blame you; that is the first reaction I got as well.
If you search the top posts with the Kubernetes tags on this website, you will find a myriad of tutorials and people explaining Kubernetes. These posts are the most trending because people WANT to understand Kubernetes because we feel like, in today's software development world, Kubernetes is unavoidable. And this is true, to an extent…
Software developers are often required to understand and work with Kubernetes; if you have ever looked for jobs in this sector, you know this already. But what if there was a tool to minimize your touching points with Kubernetes? A tool that simplifies the process and gives you guidance when trying to deploy applications into Kubernetes clusters. A tool that is highly customizable and lets someone in your organization (who understands Kubernetes, commonly known as a DevOps) create a user interface for you!
Yep, you guessed it, it’s Cyclops! 😄
And just to clarify, Cyclops is not used to create and manage Kubernetes clusters and other infrastructure; rather, Cyclops is used for deploying and managing applications INSIDE the cluster.
Show us your support 🙏🏻

We are building Cyclops to be open-source, and your support would mean the world to us. Consider giving us a star on GitHub and following us on ProductHunt, where we scheduled our very first release!
Before we start
In order to test out Cyclops, you are going to need a few things. If this is not your first time using Kubernetes, the chances are you already have everything ready, but we will still describe each of the components for the newcomers to the Kubernetes space. These tools are not only used for Cyclops, and you can use them for anything Kubernetes-related.
The main thing you are going to need to test out Cyclops is a Kubernetes cluster. If you have one that you can use to play with, great; if not, we will show you how to spin up a cluster on your own computer. So, the three prerequisites for doing this are:
Docker is the most popular containerization tool, and we will use it to download and spin up a Minikube image. Downloading Docker is straightforward: go to their webpage and download the Docker Desktop application.
Minikube plays the role of a Kubernetes cluster on your local machine. It is a great tool for developing and testing out your Kubernetes applications, and it is perfect for this scenario. You can find a guide on how to install it here.
The final thing missing is a way of communicating with your Kubernetes cluster, and this is done through the Kubernetes
command line tool called kubectl. It can be used to deploy applications, inspect and manage cluster resources, and
view logs. In this tutorial, we will use it to install Cyclops into our cluster on Minikube and expose its
functionality outside the cluster.
Installing Cyclops
Once you have your Kubernetes cluster ready (check the Before We Start section), installing Cyclops is a
straightforward process. Using kubectl, run the following command in your terminal:
kubectl apply -f https://raw.githubusercontent.com/cyclops-ui/cyclops/v0.2.0/install/cyclops-install.yaml
It will create a new namespace called cyclops and deploy everything you need for your Cyclops instance to run.
Now, all that is left is to expose the Cyclops server outside the cluster. You will need to expose both the backend and frontend with the commands below.
Expose frontend through:
kubectl port-forward svc/cyclops-ui 3000:3000 -n cyclops
And the backend through:
kubectl port-forward svc/cyclops-ctrl 8080:8080 -n cyclops
And that's it! You can now access Cyclops in your browser at http://localhost:3000.
If you are having trouble with the port-forward commands, you probably just need to wait a few of seconds after
installing Cyclops into your cluster, it can take a while to start all it’s resources.
It’s Demo Time 💥
Now that you have your Cyclops instance up and running, it’s time to see what it’s capable of.
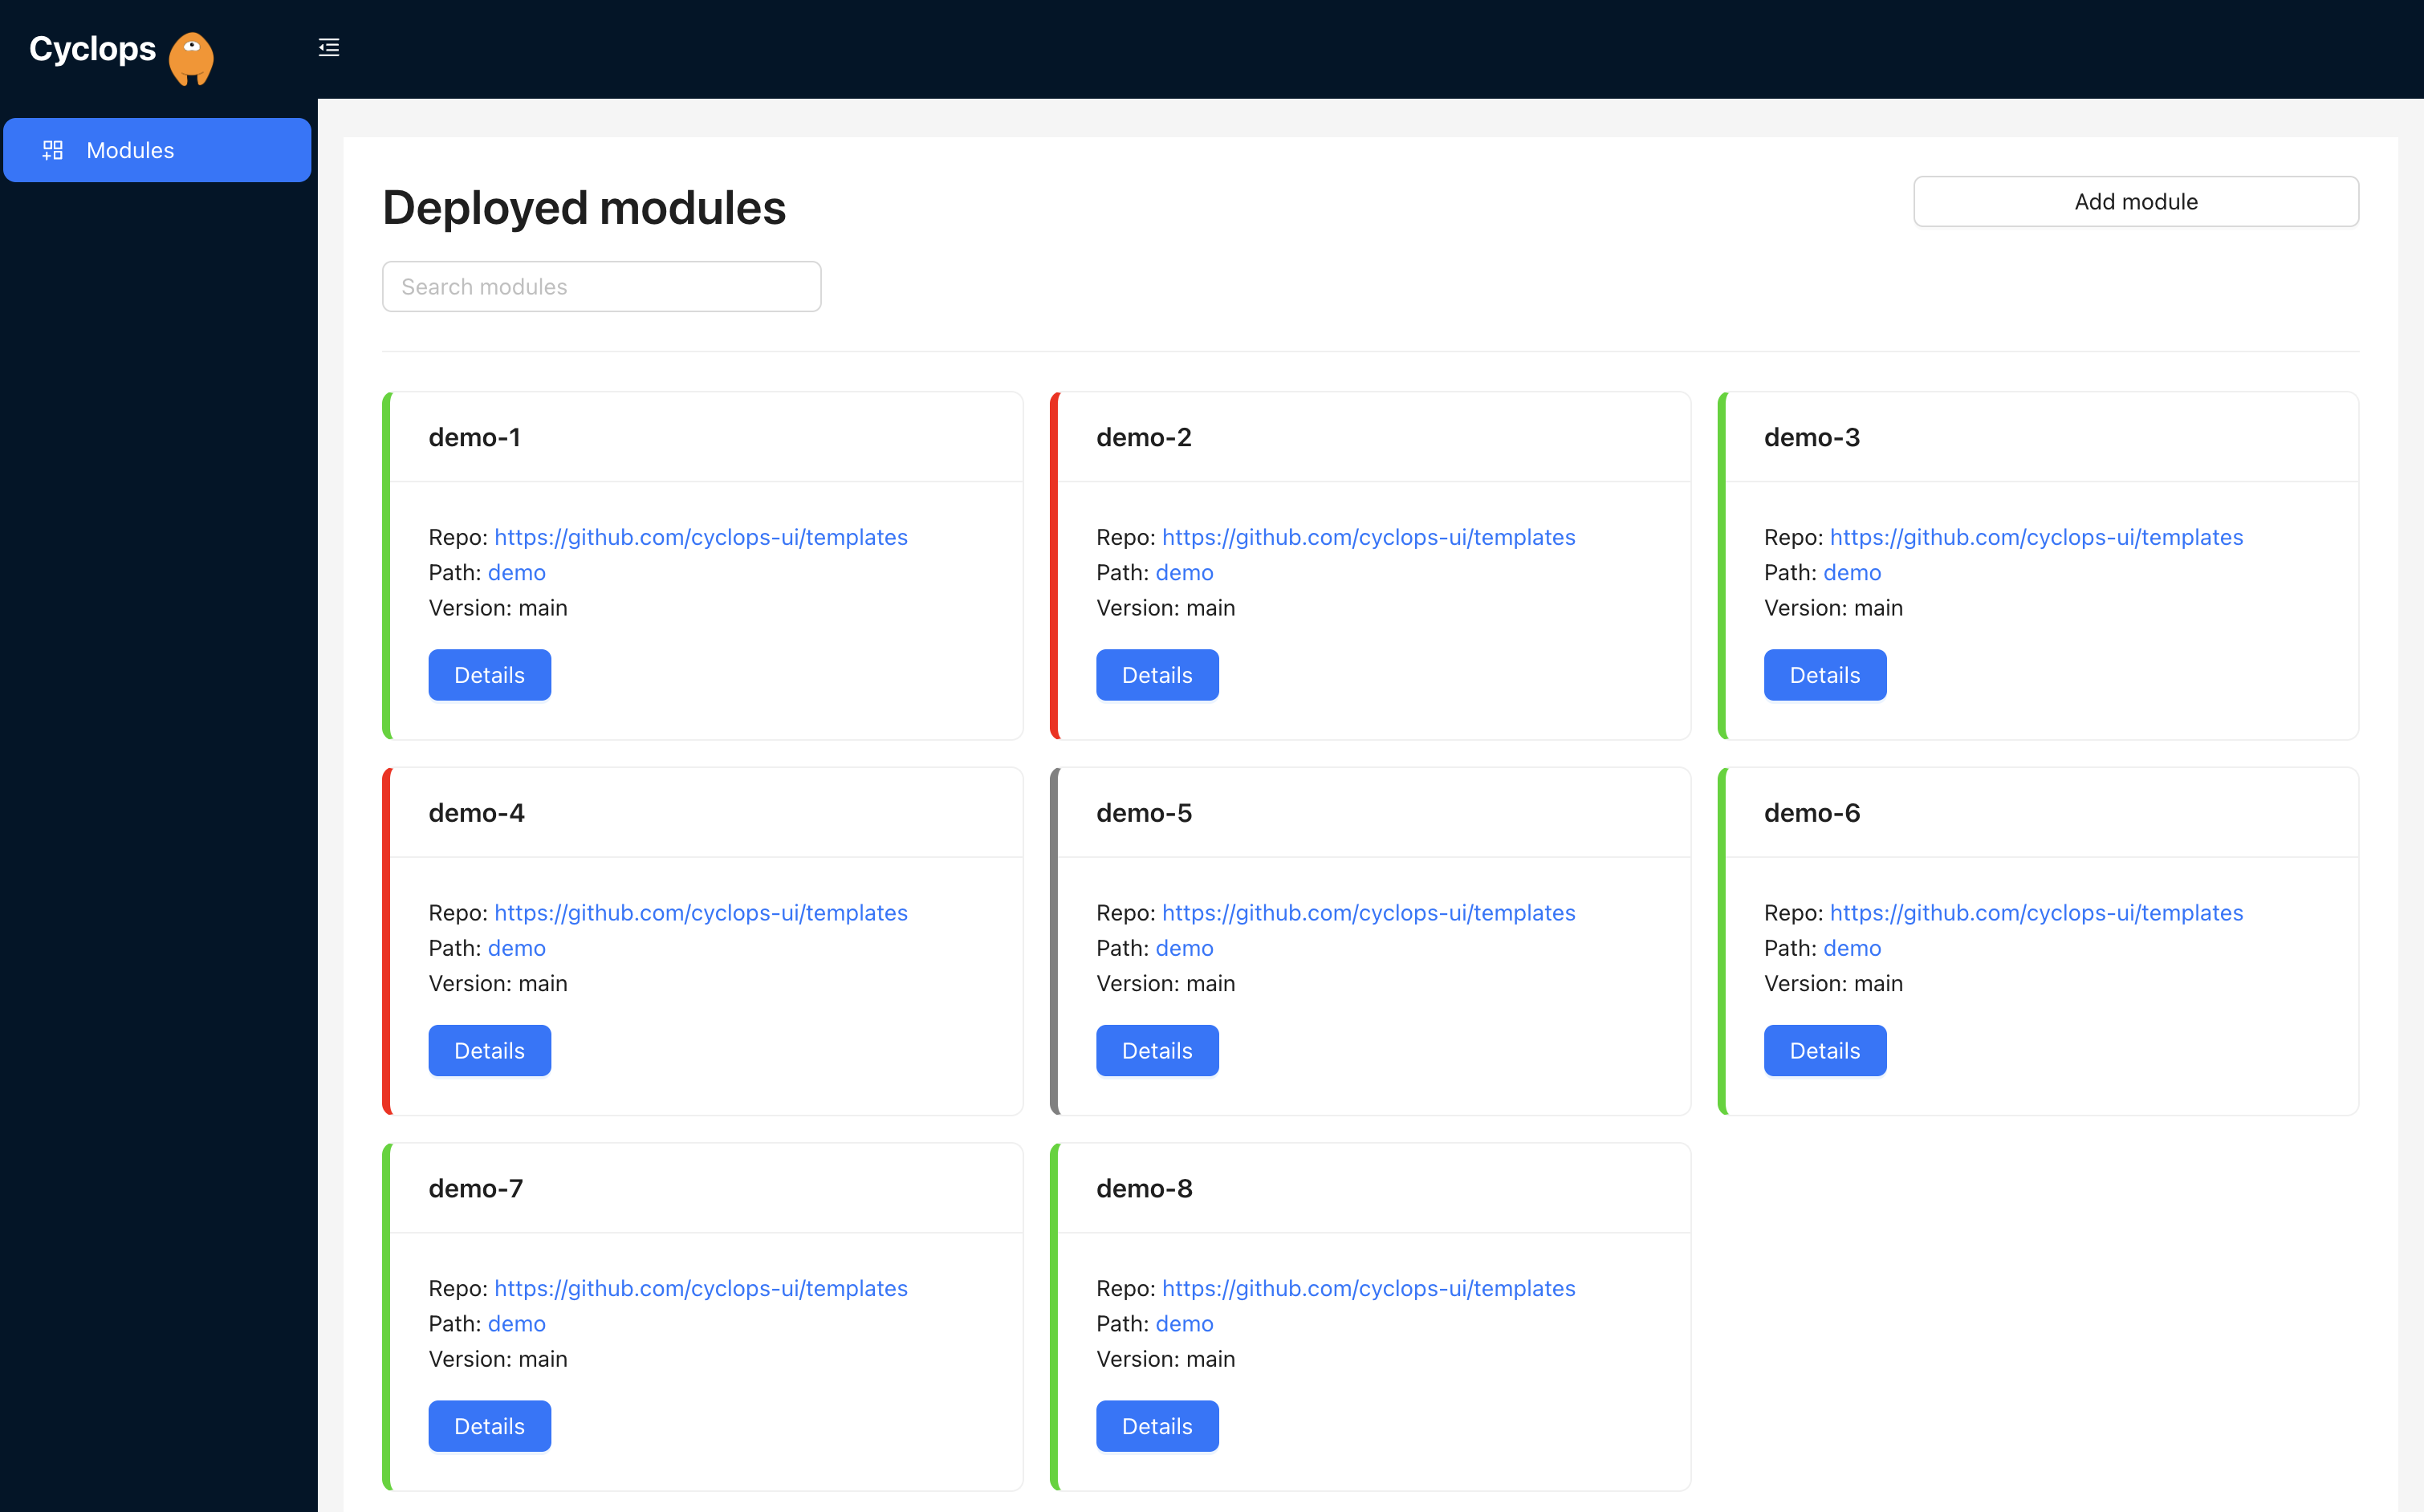
You should be greeted with an almost empty screen with no deployed modules showing. Module is Cyclops’s slang for application 😎. So, let’s start by creating our first module!
By clicking on the Add module button in the top right corner, you should be taken to a new screen. Here, Cyclops asks us which Helm chart do we want to deploy.
Not to go too deep, but Helm is a very popular open-source package manager for Kubernetes. It helps you create configuration files that are needed for applications running in Kubernetes. These charts let Kubernetes know how to handle your application in the cluster.
Don’t worry; to showcase the basics of Cyclops, we created a simple Helm chart so that anyone can follow along. You can find what it looks like in our GitHub repository, along with a couple of more examples of Helm charts that you can use!
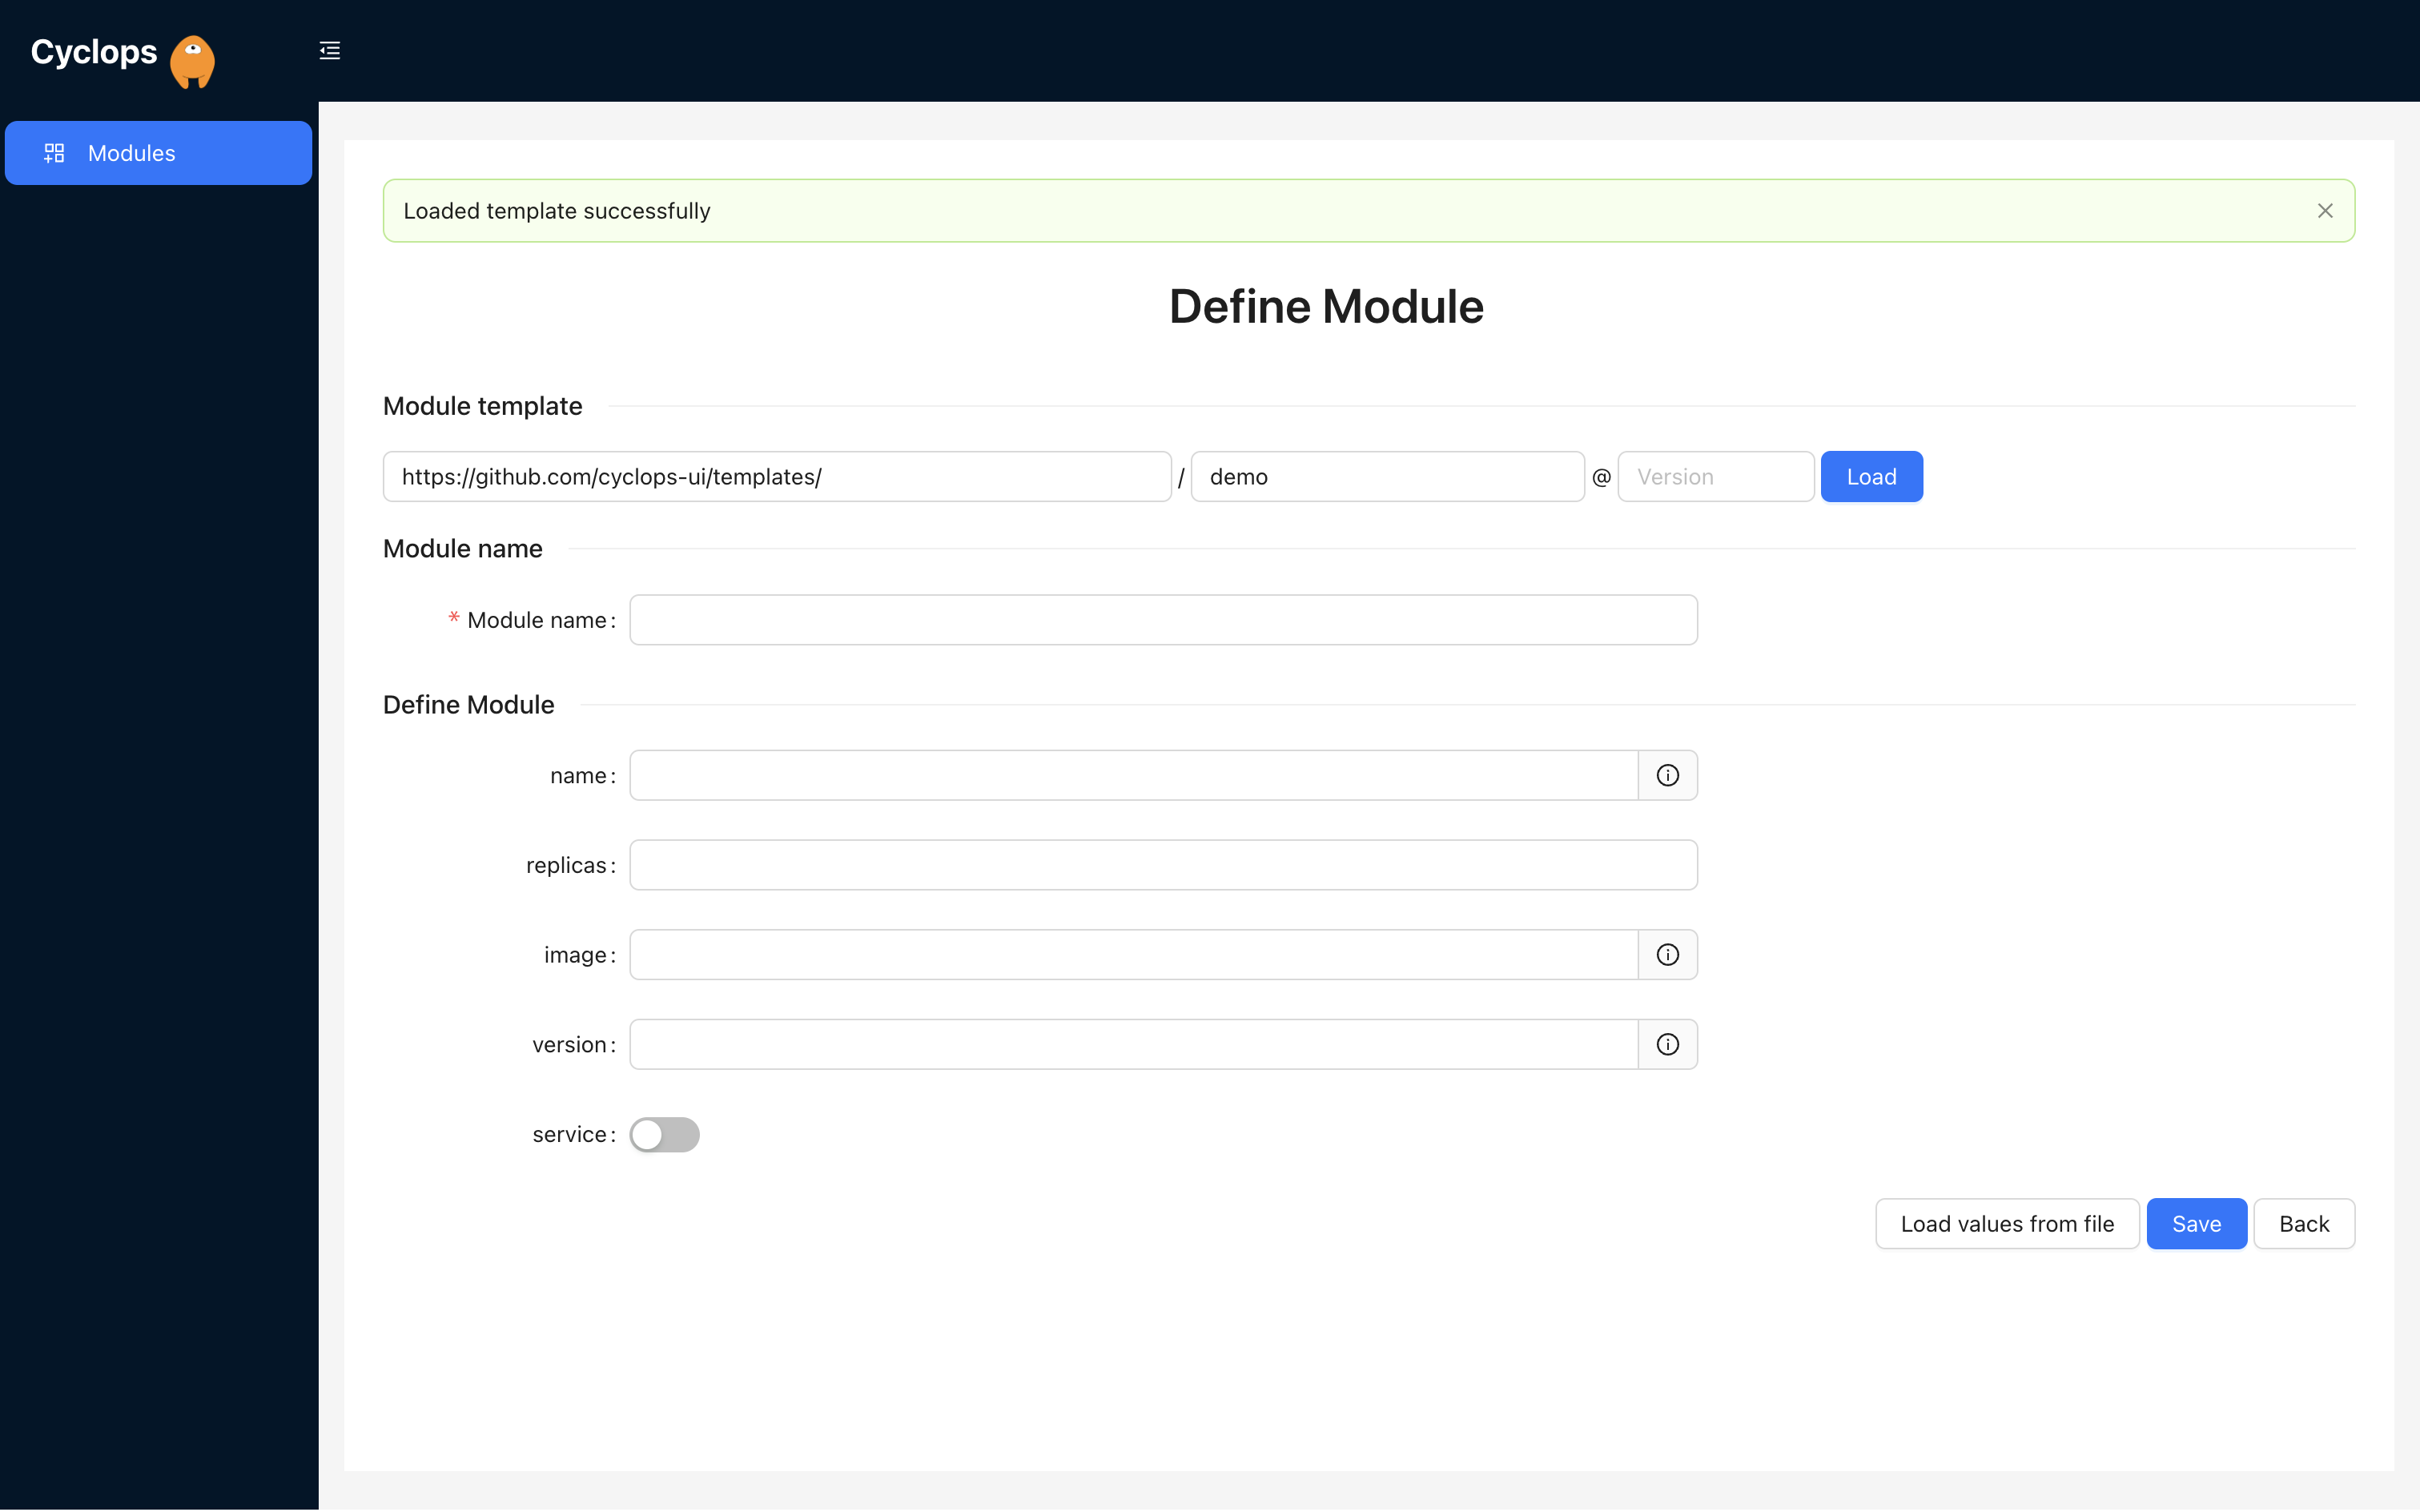
As you can see, once you enter the repository of your chart, Cyclops will render a user interface. If you want to find out the magic behind the rendering, check out our previous blog.
You can fill out the fields as you wish, but be mindful of the Kubernetes naming conventions!
If you want to follow along, my input is as follows:
name: demo
replicas: 1
image: nginx
version: 1.14.2
service: true
We will set the module name to demo as well. Click save, and Cyclops will show you the details of your new module.
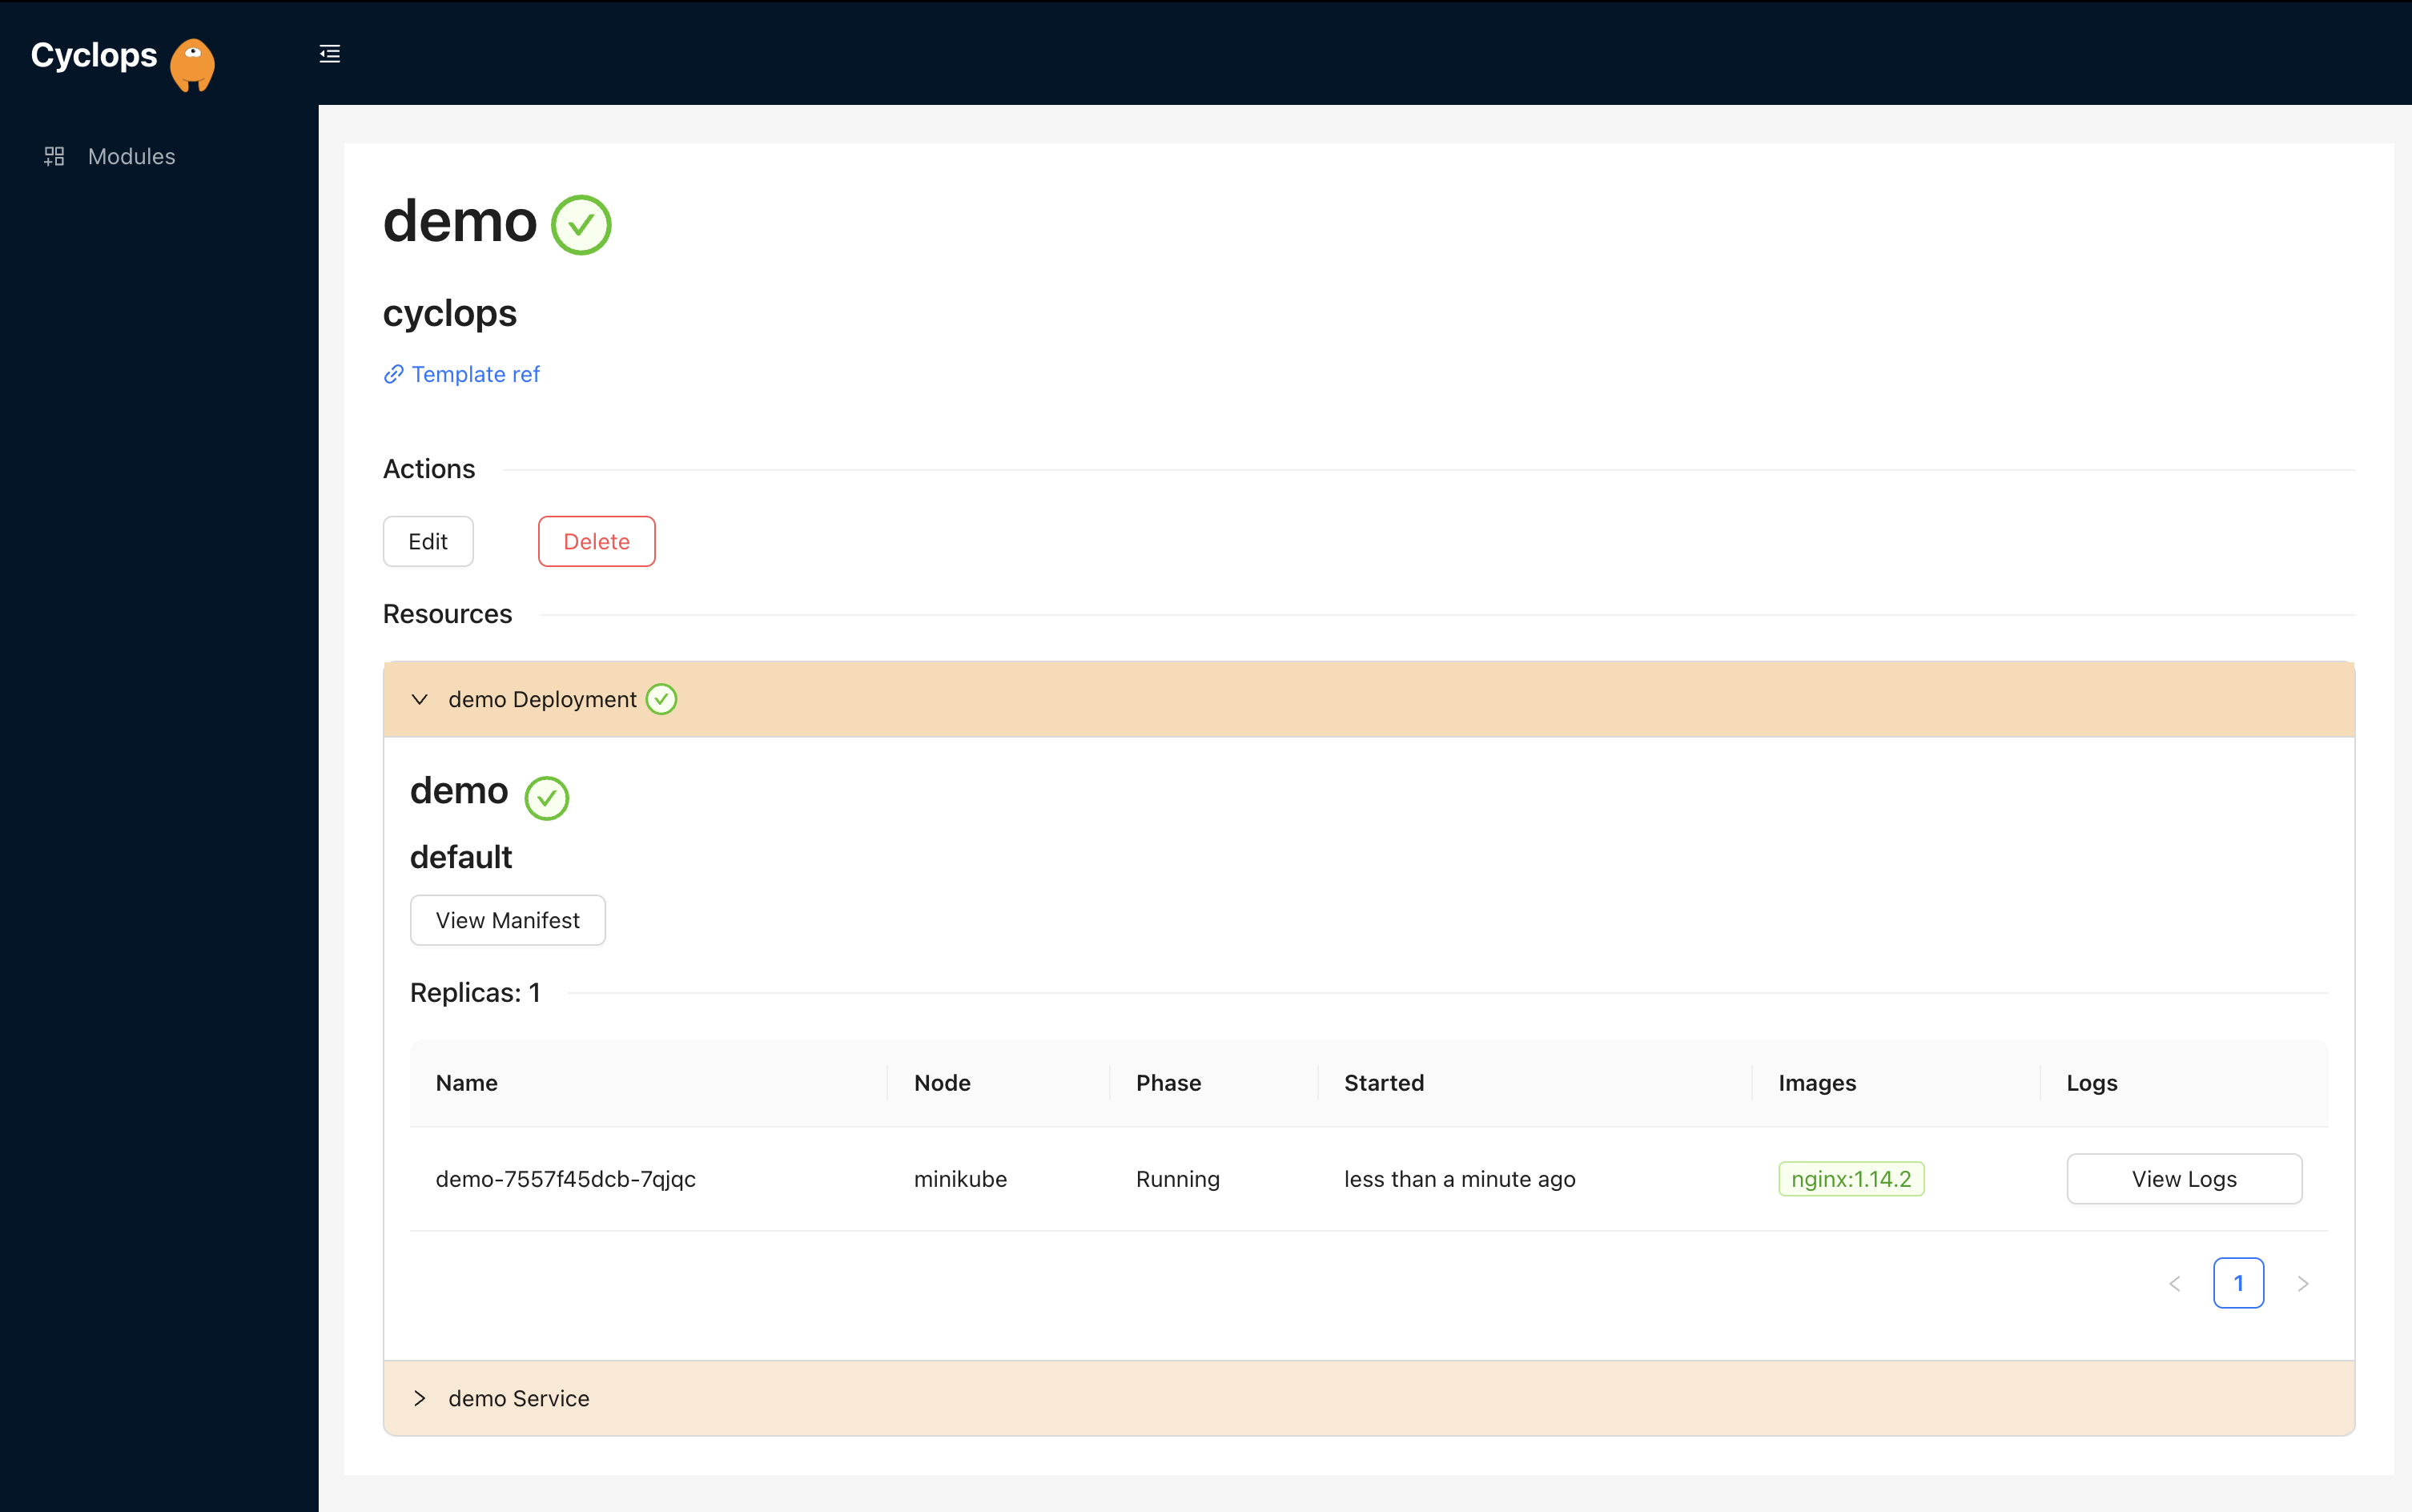
This screen shows you all the resources your application is using at the moment. It will list all the deployments,
services, pods, or any other resource. Here, we can see that Cyclops deployed one pod into your cluster, as we specified
in the replicas field. If you want to make sure that it really is running in your cluster, you can check it out by using
the following kubectl command:
kubectl get pods
But what if all of a sudden, there was a need to scale up your application or any other resource? Well, don't worry; with Cyclops, it’s really easy!
By clicking the Edit button, you can change the values of your application’s resources. Let’s try to scale our application up to 3 replicas and see what happens.
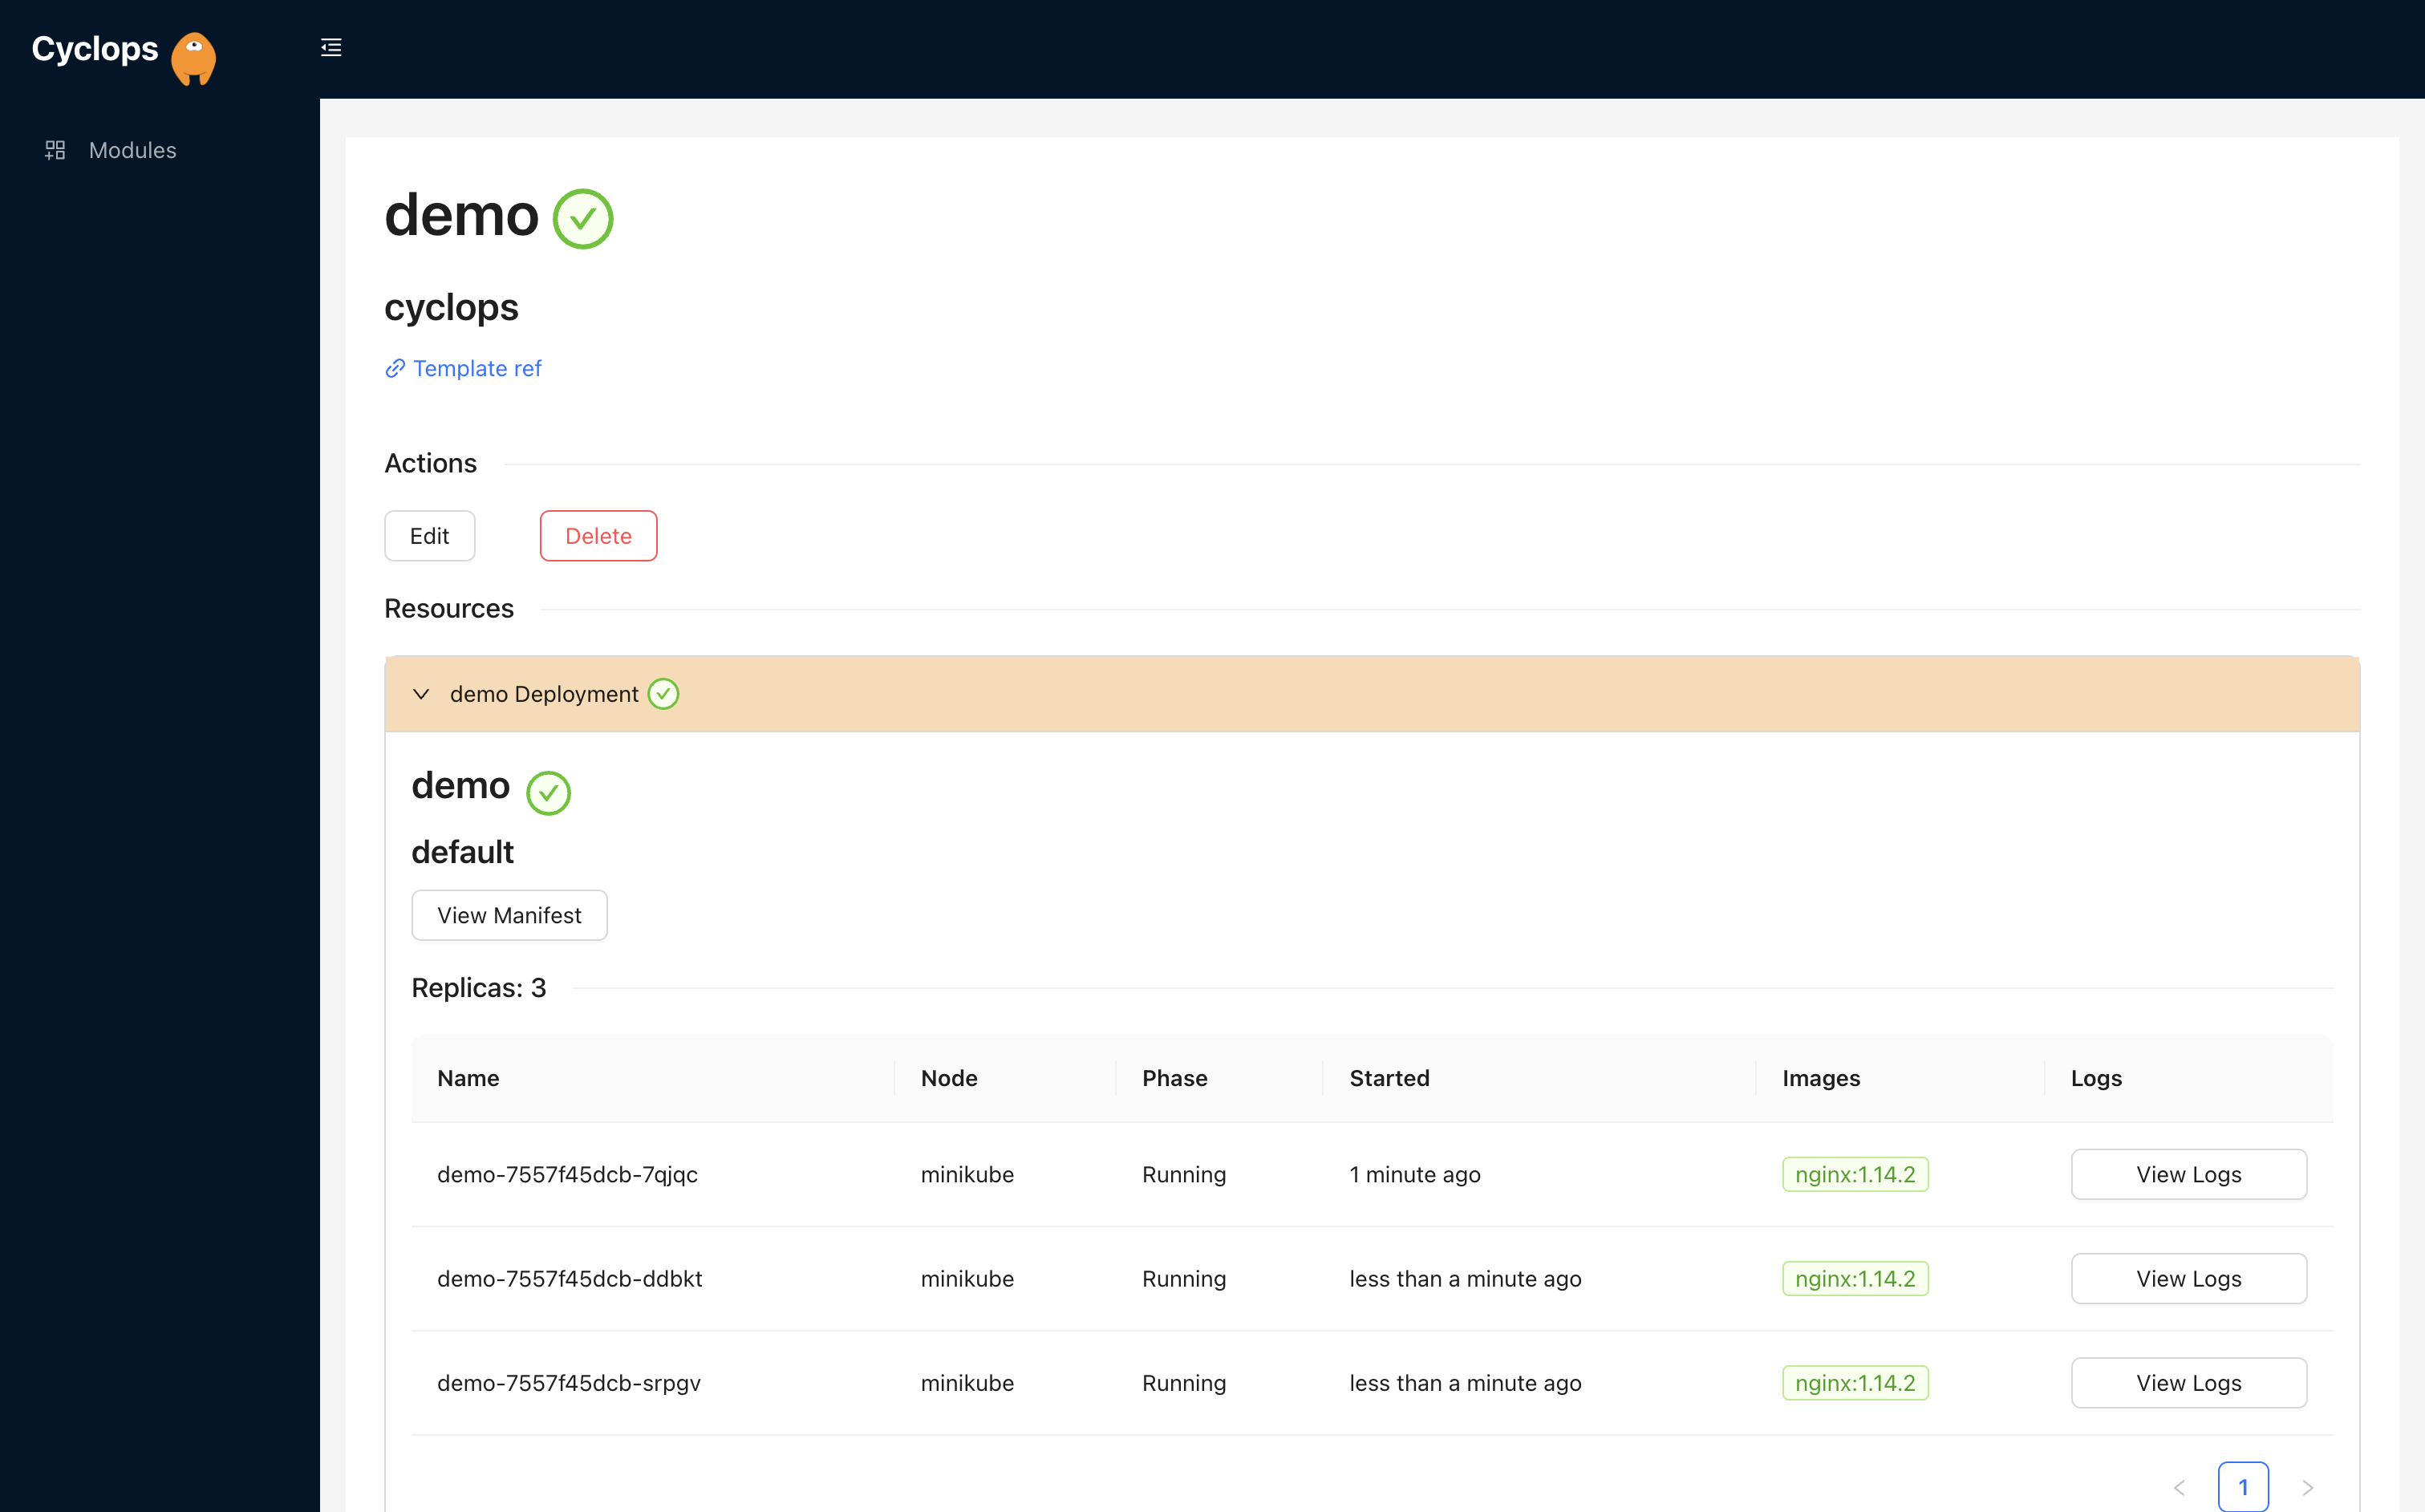
You should now see two more pods in the Deployment tab; hurray! 🎉
Of course, this works for any other change you might want to make to your application. Like, the service, perhaps? What if we realized we don't really need it anymore? Well, with Cyclops, it's really easy to shut it down if need be.
Click again on the Edit button, and this time, turn off the service toggle.

Cyclops won't delete it automatically but will warn you (via the warning triangle sign) that you shut it down, and it is not in function anymore. This means you can safely delete it!
And if you are sick and tired of your application, you can delete the whole thing as well 🗑️
Click on the Delete button and fill in the name of the module to safely delete it. You can, again, check if it really
was deleted with kubectl:
kubectl get pods
Finish
And that’s all there really is to it! Cyclops allows people with varying knowledge of Kubernetes to leverage its power. If you followed this tutorial, you should have deployed your very first application using Cyclops; congratz! 🎉 On our webpage, you can find one more tutorial showcasing more features and a more complicated use case, as well as our contact and community info.
If you have any sort of feedback or ideas on how to make Cyclops better, you can fill out our short Google form!